Growing Indoor Microgreens // How-To
When all the greenery of nature fades into starkness. Blankets of snow cover the hillsides and drips off the trees. When a fresh air awakens your lungs into a thrilling frenzy. Winter. With it's own mysterious beauty comes over the land and reminds us of all the little things we take for-granted in summer.... things like, sweltering suns, warm rains, flowers fluttering in the wind, and greenery.... everywhere.

One way to add a little color and life to these cold winter months, and not to mention an extra dose of nutrition to the winter diet is growing your own salad fixings, or in this case, microgreens. According to the Webster's Dictionary, a microgreen is a small, delicate, edible leaf of a plant that is harvested before the plant reaches full maturity. Once I began growing sprouts, that led me down a new path to try something new. Microgreens came on my radar early last fall when I was trying to find cheaper ways to provide salad to my family in the winter months. Organic salad isn't the cheapest thing to buy at the grocery store and it was something my husband requested more of in our daily diet. After a bit of research and some trial and error I've learned quite a bit about the easy and fun way to grow greens right inside your home to add more nutrition to your plate and as a bonus, more color to the house. A study done by the US Department of Agriculture along with Maryland University found that microgreens were 4 to 6 times more nutrient dense then that same plant when it reaches full maturity. Researchers discovered that the vitamins and minerals were ultra-concentrated making microgreens a power-punch of nutrition to the diet (study linked below).

The supplies needed for microgreens are very simple and can be both ordered online or picked up through your local greenhouse, hardware store, or home improvement store.
SUPPLIES:
Microgreen Seeds (I ordered mine here.)
In this tutorial I'm using Kale, Radish, Broccoli, and a mild microgreen mix
Seed Trays: Trays need to have holes in the bottom for good drainage. Salad containers and reusable baking trays make great options.
Indoor Potting Soil
A spray bottle with an adjustable nozzle like this one.

These seeds from Johnny's grew really well and I've been really happy with the product. Where ever you choose to buy seeds from make sure you choose, organic, non-GMO seeds.
DIRECTIONS:
First we need to dampen the soil by adding soil to a large bowl and then slowly add water until it reaches the right consistency... not too dry and not too wet.


They are growing bigger and bigger each day.


One way to add a little color and life to these cold winter months, and not to mention an extra dose of nutrition to the winter diet is growing your own salad fixings, or in this case, microgreens. According to the Webster's Dictionary, a microgreen is a small, delicate, edible leaf of a plant that is harvested before the plant reaches full maturity. Once I began growing sprouts, that led me down a new path to try something new. Microgreens came on my radar early last fall when I was trying to find cheaper ways to provide salad to my family in the winter months. Organic salad isn't the cheapest thing to buy at the grocery store and it was something my husband requested more of in our daily diet. After a bit of research and some trial and error I've learned quite a bit about the easy and fun way to grow greens right inside your home to add more nutrition to your plate and as a bonus, more color to the house. A study done by the US Department of Agriculture along with Maryland University found that microgreens were 4 to 6 times more nutrient dense then that same plant when it reaches full maturity. Researchers discovered that the vitamins and minerals were ultra-concentrated making microgreens a power-punch of nutrition to the diet (study linked below).

The supplies needed for microgreens are very simple and can be both ordered online or picked up through your local greenhouse, hardware store, or home improvement store.
SUPPLIES:
Microgreen Seeds (I ordered mine here.)
In this tutorial I'm using Kale, Radish, Broccoli, and a mild microgreen mix
Seed Trays: Trays need to have holes in the bottom for good drainage. Salad containers and reusable baking trays make great options.
Indoor Potting Soil
A spray bottle with an adjustable nozzle like this one.

DIRECTIONS:
First we need to dampen the soil by adding soil to a large bowl and then slowly add water until it reaches the right consistency... not too dry and not too wet.

The next step is to add the soil to the trays. If you are using a tray such as an old salad container make sure it is washed out and that you've made holes in the bottom for good drainage. Make 5-7 holes depending on the size of the tray using a pair of scissors being careful not to injure your hand. Now we're ready to transfer the soil to the trays. Only fill the trays about 1/3 full of soil.

Now it's time to sow our seed. Seeds should be sown very heavily on top of the soil.... no need to make holes.


Once seeds are down, sprinkle a light layer of soil on top of the soil.


Now that our seeds are planted it's time to find a sunny window in the house to place them in. I'm using a window in my living room. Make sure you set the seed trays on a plate or tray to catch any excess water.

Water microgreens 1 to 3 times per day depending on the humidity level in your home. We want to keep the soil moist... not too wet and not too dry. Before germination and right after germination it is best to water with the mist setting on the nozzle. Germination will take place between 3 to 5 days.

In the picture below are the plants as they are first sprouting.

They are growing bigger and bigger each day.

Once microgreens fill out it's best to change your nozzle to the stream setting and when you water, gently pull back the leaves and water at soil level. Keeping moisture off the leaves as much as possible will ensure an ideal environment for your microgreens to flourish. If you find the microgreens are laying down then you've either over watered or under watered so adjust watering accordingly and they should spring back to life.

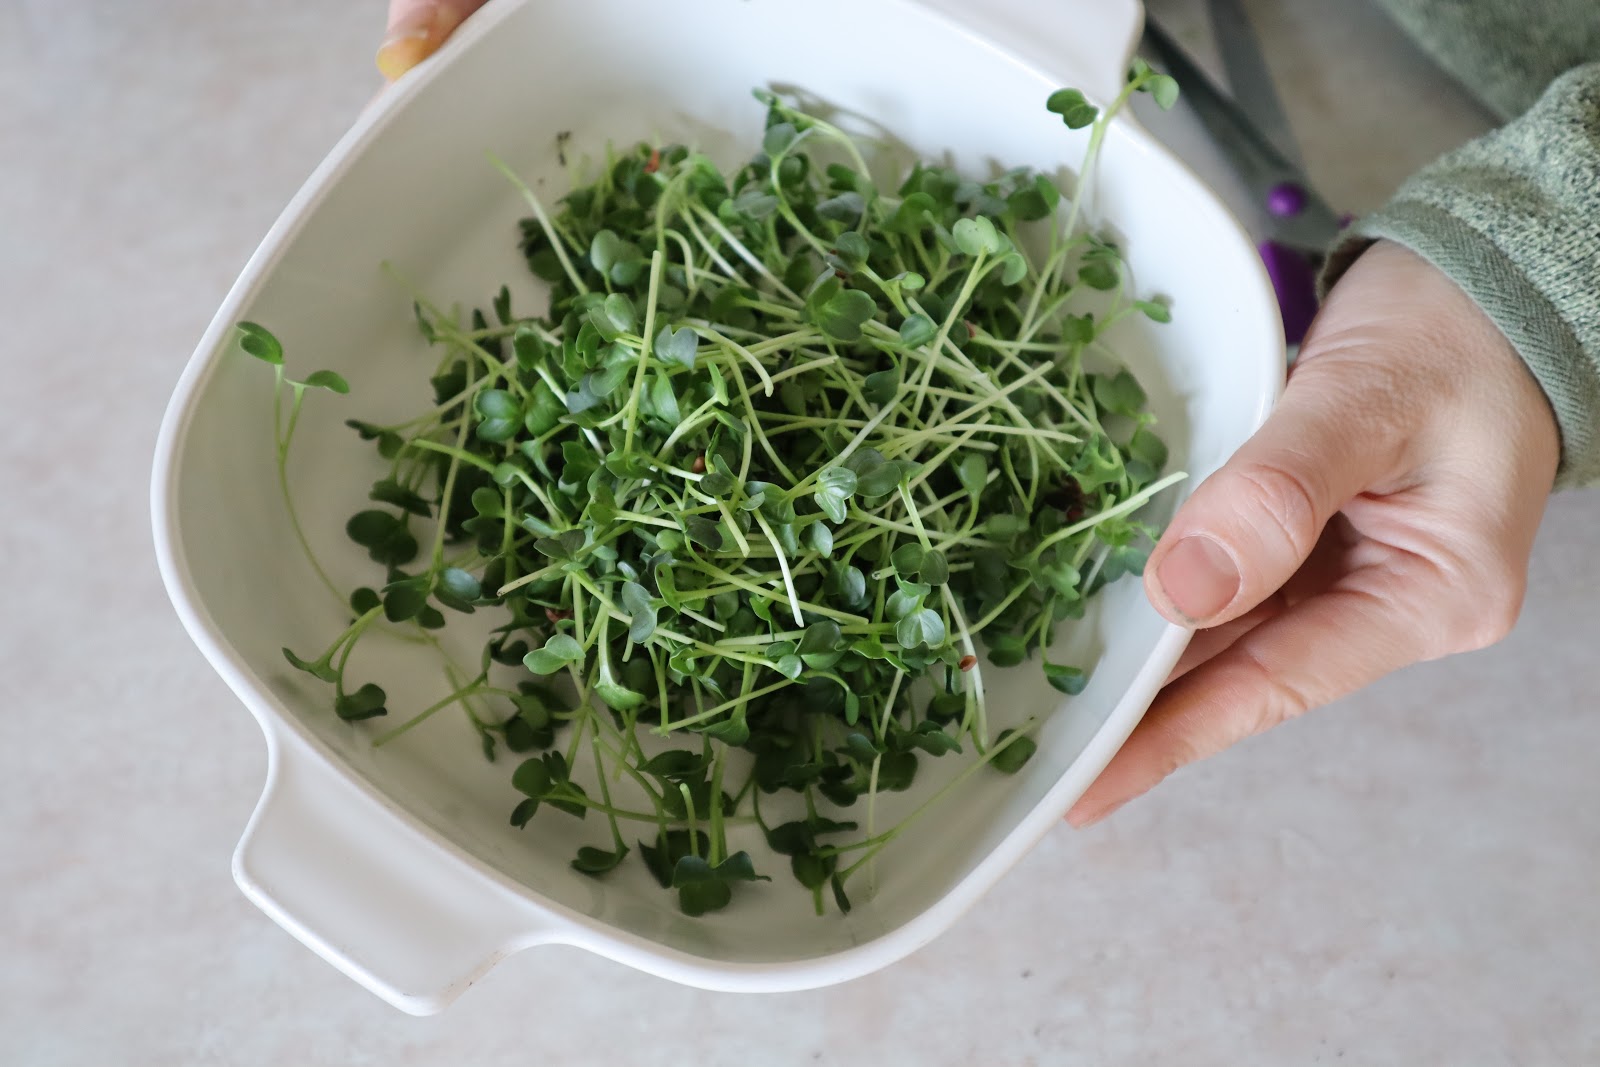
HARVEST
Microgreens are ready for harvest between 2 to 4 weeks and/or when the microgreens are 2 to 4 inches tall. Harvest microgreens by cutting just above the soil with a pair of scissors.

Store microgreens in an airtight container and they will keep in the fridge up to two weeks.
Once you've harvested all your microgreens, water the cut microgreens and place back in the sunny window because sometimes you can achieve a second cutting from the same microgreens!

And that's it! Simple and easy. Microgreens taste great on salads, with scrambled eggs, on top of sandwiches, and in a yummy stir-fry. The sky's the limit.

REFERENCES:
https://www.ars.usda.gov/news-events/news/research-news/2014/specialty-greens-pack-a-nutritional- punch
https://www.merriam-webster.com/dictionary/microgreens? utm_campaign=sd&utm_medium=serp&utm_source=jsonld

This is perfect!!! I've been looking into how to do this! Thanks for sharing!
ReplyDeleteYour welcome! Glad it was helpful!
Delete